Chapter 3 - Remotely operate the Yaesu FT-991a

Table of Contents
This chapter is part of a series of posts:
- Remote control the great Stockcorner JC3-s tuner
- Automate remote & local tuning of the JC3-s tuner
- Remote transmission and reception of all common operation modes, including voice
To learn more about the series, go here.
Chapter 3 - Complete remote operation⌗
In the past walls of text chapters, we learned how to make a START and KEY enabled tuner part of our IoT smart home and how to remotely control our Yaesu transceiver. Now it’s time to add the remaining piece of the puzzle: Audio.
In the past, HAMs were using mumble for connecting to remote machines. Mumble is fine and in general with low overhead, but it requires a server in between, which either runs on the machine connected to the transceiver or on a server in the web. This adds complexity we’d like to avoid.
Therefore, I opted to use roc project, which is a modern set of tools promising real-time audio via network. It’s beauty: There’s great documentation on how to get it to on all major OS (besides iOS).
To replicate elements presented in this post you need:
- Ability to use the console/terminal
- A machine running Linux and using PulseAudio connected to your transceiver
- Either macOS, Windows, Android or Linux on your client
Roc on the Raspberry Pi⌗
Since all the past posts eyed the Raspberry Pi 4, the instructions given here will be specific to a 64bit OS running on the Pi. I opted for Ubuntu 20.04 LTS (but Debian 11 might have been a better choice).
You need to compile Roc for the Raspberry Pi. There are several ways to do this, for example, you could compile directly on the pi – but that would take longer than needed. Roc proposes to run a docker container on your machine. I love this idea and run docker on all my machines anyway.
Prepare modules and roc apps⌗
I adapted the recipe they offer in their cookbook to create the necessary PulseAudio modules:
# build libraries, tools, and PulseAudio modules
$ docker run -t --rm -u "${UID}" -v "${PWD}:${PWD}" -w "${PWD}" \
    rocproject/cross-aarch64-linux-gnu \
      scons -Q \
        --enable-pulseaudio-modules \
        --host=aarch64-linux-gnu \
        --build-3rdparty=libuv,libunwind,openfec,alsa,pulseaudio:13.99.1,sox,cpputest
You have to specify the PulseAudio version used on your machine. For Ubuntu 20.40 this is 13.99.1 (at the time of writing).
The rest of the instruction on how to install the modules and setup roc on the raspberry can be folfollowed the dot:
# install Roc binaries
$ scp ./bin/aarch64-linux-gnu/roc-{recv,send,conv} <address>:/usr/bin
$ scp ./bin/aarch64-linux-gnu/libroc.so.*.* <address>:/usr/lib
$ scp ./bin/aarch64-linux-gnu/module-roc-{sink,sink-input} <address>:/usr/lib/pulse-13.99.1/modules

# install Roc dependencies
$ ssh <address> apt-get install libasound2 libpulse0 libltdl7
Prepare PulseAudio on the Raspberry Pi⌗
There’s this superb guide explaining en detail how to prepare PulseAudio. In this subchapter I will only explain sections where I deviated from the linked guide, thus info given here might not be enough to get things going. I took a lot of info from that page, but for our situation I needed to adjust additional settings:
- Prepare PulseAudio for lowest possible latency
- Enable access to PulseAudio from two clients at the same time without resorting to root
- Stop an XServer session from using its own PulseAudio settings
First, let’s enable sending and receiving of audio.
I added the sink to receive audio close to the top of default.pa. The remote_ip is the address of your machine you send from. This cannot be a hostname (sadly), so make sure that your local network always assign the same IP to clients, or don’t use DHCP.
$ cat /etc/pulse/default.pa

.fail
load-module module-roc-sink remote_ip=SENDIP
You need to uncomment the line for this module and adjust as seen. If you are a bit on the careful side, you can also add a user group PulseAudio, add all users going to use PulseAudio to it and not use auth-anonymous, but auth that user group. But that was a bit too much for my taste.
$ cat /etc/pulse/default.pa
[...]
load-module module-native-protocol-unix auth-anonymous=1 socket=/tmp/pulse-socket
[...]
After, make the following change. Uncomment the default-server setting and change as seen. This tells PulseAudio to have clients use the socket. This way we allow multiple clients at the same time.
$ cat /etc/pulse/client.conf
[...]
default-server = unix:/tmp/pulse-socket
[...]
The last lines of my default.pa look like this.
$ cat /etc/pulse/default.pa
[...]
load-module module-roc-sink-input
### Make some devices default
set-default-sink roc_sender

.ifexists /usr/lib/pulse-13.99.1/modules/module-xrdp-sink.so
load-module /usr/lib/pulse-13.99.1/modules/module-xrdp-sink.so
.endif
.ifexists /usr/lib/pulse-13.99.1/modules/module-xrdp-source.so
load-module /usr/lib/pulse-13.99.1/modules/module-xrdp-source.so
.endif
You’ll notice, that I added xrdp modules. With those modules, audio can be sent and received via an RDP client. This way you can use your rig from anywhere in the world, all you need is the ability to connect to it via RDP. I touched on this in another post. If you also want to use xrdp PulseAudio modules, I made an additional change to the script starting xrdp:
$ cat /etc/xrdp/sesman.ini
[...]
[SessionVariables]
;PULSE_SCRIPT=/etc/xrdp/pulse/default.pa
PULSE_SCRIPT=/etc/pulse/default.pa
This change keeps xrdp from loading its default.pa file. I’m not certain, if this change is required, but it helped to stabilize my experience. Which is a lot to achieve with linux audio.
Transport audio to roc sender⌗
PulseAudio also has a default loop back module one could use, but it is often recommended against, as it’s supposed to add latency.
Instead, I use pacat:
pacat -r --latency-msec=1 -d alsa_input.usb-Burr-Brown_from_TI_USB_Audio_CODEC-00.analog-stereo | pacat -p --latency-msec=1 -d roc_sender
! alsa_input.usb-Burr-Brown_from_TI_USB_Audio_CODEC-00.analog-stereo is the USB sound card of the Yaesu FT-991a. If you use a different transceiver, use the command pactl list sinks to find out the correct device and use its full name.
You can trigger pacat and the pipe any way you like, for example via a systemd script. In my case, I made it part of a node-RED function node which I can all via a switch in a node-RED dashboard. The switch both restarts PulseAudio (better safe than sorry) and starts pacat.
Lower the latency of pulseaudio⌗
roc project is still in development and chances are that tings will get better with improved alsa/pulseaudio support, but for now, I managed, thanks to the Internet, to lower the latency. This is crucial for digi modes like ft8, where a couple of hundred milliseconds of latency can mean you are not decoding frames properly or will never have a proper QSO.
This page was a great help in fixing latency issues. To make the changes it proposes permanent, I modified the udev module call in the default.pa:
$ cat /etc/pulse/default.pa
[...]
### Automatically load driver modules depending on the hardware available
.ifexists module-udev-detect.so
load-module module-udev-detect tsched=0 fixed_latency_range=yes avoid_resampling=yes
.else
[...]
Adding the options tsched=0 fixed_latency_range=yes avoid_resampling=yes to load-module module-udev-detect apply the recommended changes every time a new device is detected. Now, I haven’t found this option documented, but it works for me. Yay?
That would be all for the Raspberry Pi. Linux audio is cumbersome, but at the end, it allows you to do ANYTHING. Which is great. But also annoying. And I am still not sure if some of my stuff is just luck, snake oil or bound to break with the next update. Looking at you, version number of PulseAudioo.
roc on macOS⌗
I am using macOS as a daily driver client side. Getting roc to run on macOSS is not super hard, but to do something useful with it is cumbersome.
Windows users: Use mumble. I think at this time, Windows users are out of luck in regard to roc. You need to rely on mumble. Once mumble transported audio to your client, you can use any other method to transport it to your apps.
iOS users could also use mumble to transport audio to their devices, but since xRDP can be used via RD client on iOS and transports audio bi-directionally, you can install your digi apps server side and connect remotely.
Compile on macOS⌗
In this case, simply follow the cookbook. To run the commands given, you need to install homebrew, which is great to have installed in any case.
Blackhole Virtual audio devices⌗
roc-recv and roc-send receive and send audio to and from your mac. Simple. But you have to feed them audio. You cannot simply route your internal speakers and microphone to them. Think about it: fldigi sends it’s audio to roc-send on the raspberry pi. Your roc-recv receives this audio and makes it available to your system. Sadly, roc project (so far) does not present itself as new audio devices on your system, but instead can be mapped onto existing audio devices. If you were simply to map it to your existing internal speaker and microphone, you would create a loop and would not be able to hear anything but annoying beeping of ft8, or demodulated SSB etc. But actually all you would hear is a horrible feedback loop. So, no, you need to add something.
You have to install virtual audio devices, which can receive and send audio, which are then exclusively used by roc. Yes. Annoying. I know. Blame Apple.
I would recommend installing two instances of the blackhole virtual audio device. One for sending and one for receiving. For this, you need Xcode and compile yourself. Compilation is rapid. If you haven’t installed Xcode on your machine, you will wait more time for it to install than compilation will take time. Fortunately, the blackhole project gives great instructions on how to compile. I am not a coder, so when I think it’s easy, it is.
Before compiling: You do need to change the channel configuration to two channels or roc won’t work and you also need to change the name for the second copy of blackhole. You can give each a descriptive name to know what their purpose in life will be.
Run roc-recv and roc-send⌗
After you’ve created your new core audio devices, you can actually send and receive audio properly!
The core-send command requires the IP of the device you are sending to. Yes, also on the macOS side, no hostname support.
/usr/local/bin/roc-send -vv -s rtp+rs8m:SENDIP:10001 -r rs8m:SENDIP:10002 -d core -i 'SENDDEVICE'
You would put the blackhole device for sending audio here. The names of available devices can be listed via roc-send -vv -d core -i sdfklj, which would yield an error and make roc-send print a list of all available core audio devices. You can copy and paste a name as listed.
Receiving is a shorter command:
/usr/local/bin/roc-recv -vv -s rtp+rs8m::10001 -r rs8m::10002 -d coreaudio -o 'RECVDEVICE'
Both commands aren’t demonized, so each needs to be run in its own terminal session.
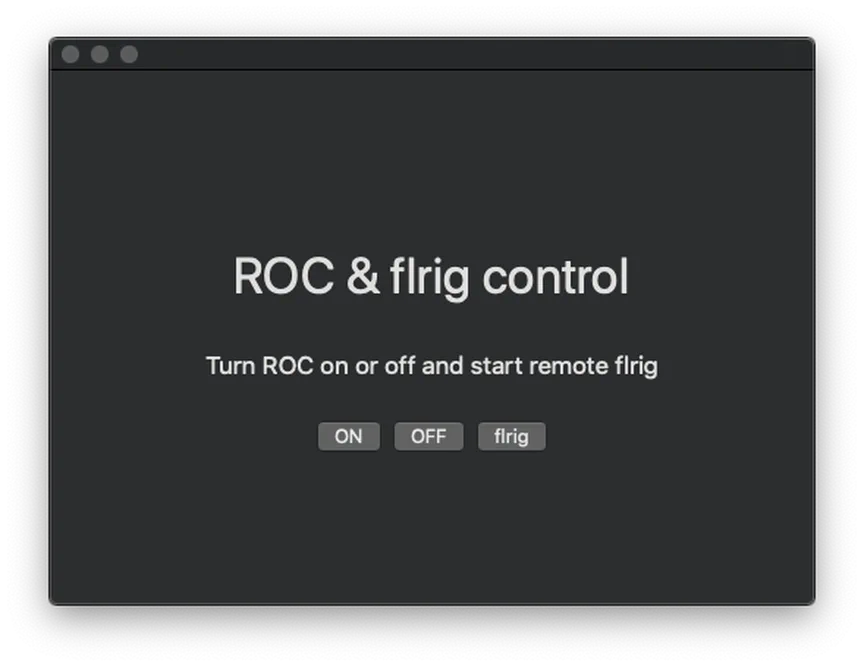
But this is nasty, having to start the terminal to do things every time. Instead, use my amazing swift code to run roc-recv, roc-send AND start local rendering of remote flrig:
//
//  ContentView.swift
//  Activate ROC
//
//  Created by Gunnar Falk on 02.06.20.
//  Copyright © 2020 Gunnar Falk. All rights reserved.
//

import Cocoa
import SwiftUI


//@discardableResult
//func shell(_ args: String...) -> Int32 {
//    let task = Process()
 //   task.launchPath = "/usr/bin/env"
 //   task.arguments = args
 //   task.launch()
 //   task.waitUntilExit()
//return task.terminationStatus
//}

struct ContentView: View {
    @State var isRunning = false
    @State var isRunning2 = false

    var body: some View {
            VStack {
                Text("ROC & flrig control")
                    .font(.largeTitle)
                    .padding()
                Text("Turn ROC on or off and start remote flrig")
                    .font(.body)
                    .padding()
                HStack {
                Button(action: {
                    let roc_send = Process()
                    roc_send.executableURL = URL(fileURLWithPath:"/bin/zsh")
                    self.isRunning = true
                    roc_send.arguments = ["-c", "/usr/local/bin/roc-send -vv -s rtp+rs8m:RPIIP:10001 -r  rs8m:RPIIP:10002 -d core -i 'SENDEVICE'"]
                    roc_send.terminationHandler = { _ in self.isRunning = false}
                    do {
                      try roc_send.run()
                    } catch {}

                    let roc_recv = Process()
                    roc_recv.executableURL = URL(fileURLWithPath:"/bin/zsh")
                    self.isRunning = true
                    roc_recv.arguments = ["-c", "/usr/local/bin/roc-recv -vv -s rtp+rs8m::10001 -r rs8m::10002 -d coreaudio -o 'RECVDEVICE'"]
                    roc_recv.terminationHandler = { _ in self.isRunning = false}
                   do {
                      try roc_recv.run()
                  } catch {}

                 }) {
                 Text("ON")
                 }.disabled(isRunning)
                Button(action: {
                    let executableURL = URL(fileURLWithPath: "/bin/zsh")
                    try! Process.run(executableURL, arguments: ["-c", "/usr/bin/killall -9 roc-recv && /usr/bin/killall -9 roc-send"], terminationHandler: nil)
                }) {
                Text("OFF")
                }
                Button(action: {
                        let flrig = Process()
                        flrig.executableURL = URL(fileURLWithPath:"/bin/zsh")
                        self.isRunning2 = true
                        flrig.arguments = ["-c", "ssh -Y [email protected] flrig"]
                        flrig.terminationHandler = { _ in self.isRunning2 = false}
                        do {
                          try flrig.run()
                        } catch {}

                }) {
                    Text("flrig")
                    }.disabled(isRunning2)
            }
            }.frame(maxWidth: .infinity, maxHeight: .infinity)
    }
}


struct ContentView_Previews: PreviewProvider {
    static var previews: some View {
        ContentView()
    }
}
It’s my first time coding in swift. This code will might land on GitHub but most likely is horrible. The result looks like this:
macOS: Add your voice? Combine inputs for roc-send.⌗
Now we come to the sad part: We need closed source software. I haven’t found a way around it.
Now that we can send audio to the Raspberry Pi via a virtual audio device and roc-send, we require a way to feed our internal, or any other microphone, into the virtual audio device. I want to add live audio, not monitor a QuickTime recording, start a GarageBand track or any other of these workarounds. I want live audio input combination.
The easiest, but commercial, solution is rogue amobea’s Loopback.
I ended with two loopback virtual devices:
- Send Audio to the FT-991a
- Pipe Audio from fldigi to my speakers
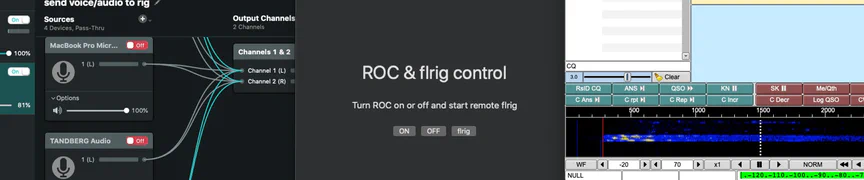
Send audio virtual device⌗
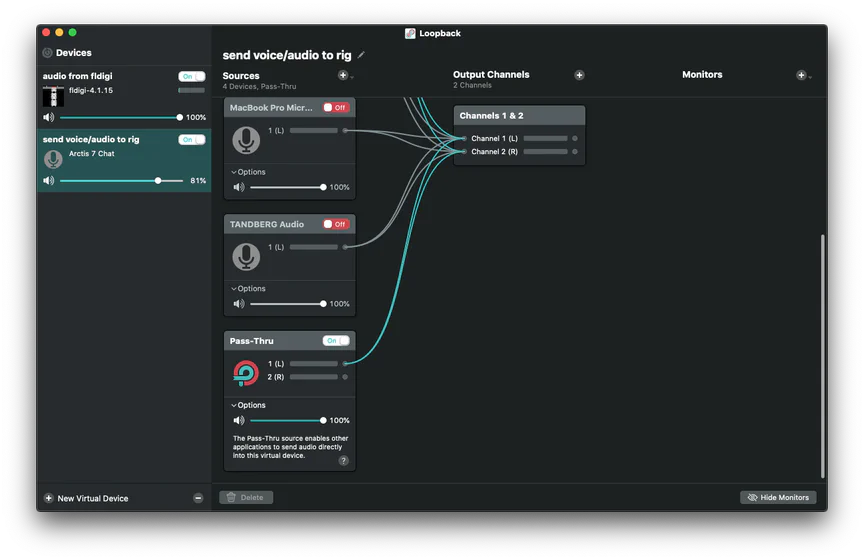
The first device is necessary to create a virtual audio device independent of the settings in MacOS. No matter what input or output is chosen in MacOS, the virtual device can be configured to pipe audio from several real or software sources to roc-send (roooooc saaaand, you don’t have to change frequency). Also notice, that I wired the Left output of pass-thru to both R and L input. fldigi, for example, outputs on the left side. Since it’s unlikely that we’ll transmit stereo, this is a safe setting.
In the image you see a bunch of the microphones I can use. I should enable only the mic I actually use, otherwise there’s going to be a nasty feedback loop.
! Notice an activated “Pass-thru”: It is necessary to pipe software generated audio to the rig. Like for FT8, fldigi phone and digi modes etc. You could also simply pipe spotify or YouTube this way, but we all know that this is not allowed.
Using good microphones attached to your machine has another huge advantage: You will have super good modulation without paying ridiculous prices for yesteryear’s ham gear.
fldigi special-snowflake piping to speakers⌗
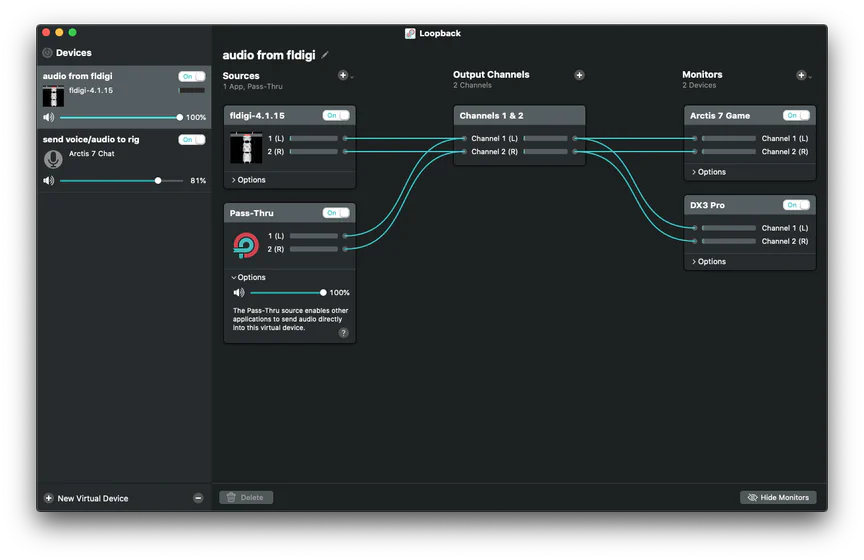
For some completely obscure reason, fldigi only plays it’s output on the built-in speakers of my MacBook Pro. I tried different bit depths, formats etc. and no change. Thus, I created a virtual audio device to pipe audio to other speakers on my system. This way I don’t need to touch the (very buggy) fldigi settings for changing output and can do everything in loopback.
In practice⌗
With the elements of this chapter place you can:
- Use digimode applications on MacOS (or Linux and Windows) and send their Audio to the FT-991a
- Use your voice for FM/SSB/AM phony via fldigi - somehow, I think this is the coolest part!
You can do this from wherever you are on the planet!
Bonus: 1750Hz tone burst⌗
Repeaters in Europe often require the use of tone bursts to be keyed up. Sadly, the FT-991a does not publish it’s “T.CALL” functionality via CAT commands. After some searching I decided to use an fldigi macro together with a short 1750Hz.wav file.
Generate the wav file:
sox -c1 -n 1750.wav synth 3 sine 1750
This command generates a new wav file with a 3 second, 1750Hz sine wave. For ease of use, I uploaded it here.
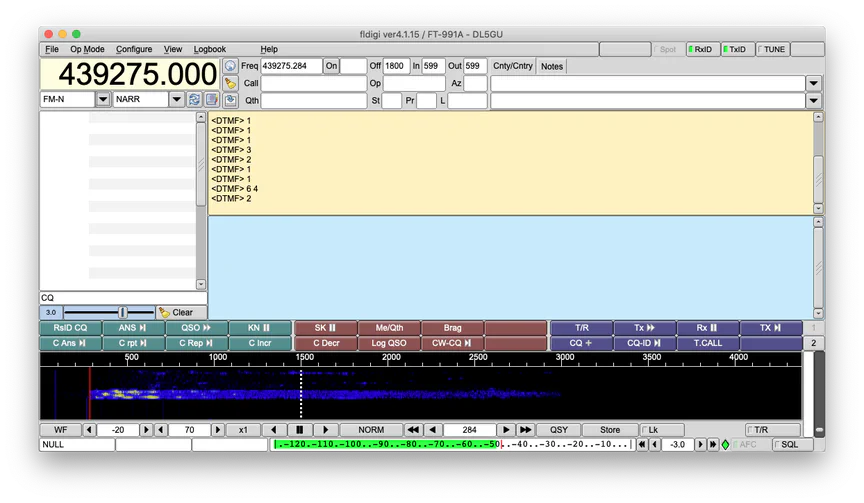
Add a new fldigi macro:
<TX><AUDIO:/<path>/<to>/<file>/1750.wav><RX>
It looks like this in my setup:
What is missing⌗
I’m not covering the following aspects:
- CW Keying
- Sending DCS/CTCSS tones
- Replicating on Windows
- Replicating on Linux
Please please please gimme feedback⌗
If you found this article useful but are missing anything, please comment and contribute. You can reach me on mastodon: [email protected] or via the comments below.